Cute Toy Cat.
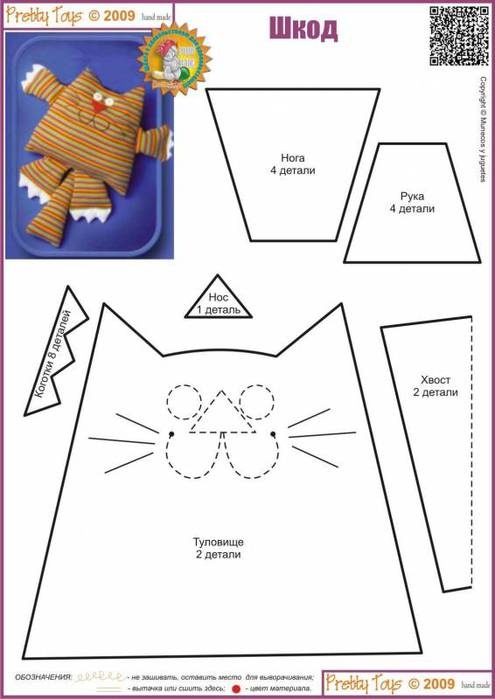
 Print three copies of the cat pattern below so you can have a master copy, and two pattern pieces for each part of the cat except the nose. I also cut out extra pieces for the claws, since I always make at least a dozen of all projects.
Words are in Russian, but you can see that the largest is the body, the larger of the two rectangles is the leg, the other the arm and the skinny one is the tail. Cut two of each piece, and four of the claws, one nose.
If you wish to enlarge the photo as I did, cut out a piece and lay it on a blank paper. Mark one inch around all the sides of each of the pieces, except nose, use your discretion as to size. I made the tail thinner for the width but added inch for the length.
When assembling the legs add the cut out piece of felt for the claws to each leg in between the two pieces for each leg bottom with the zig zag edge of the claws to the inside of the leg.
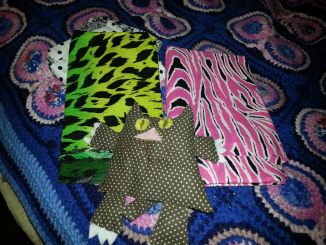
The straight edge of the claws should be on the sewing line. I added width to the claws as I have trouble with a piece that is too small. It makes it easier to sew.
Sew two and a half sides of each leg and arm, excluding the tops of each of the arms and legs. Sew one side and bottom of the tail. If you want to embroider the face, do this now.
Turn all the arms and legs so you see each from the right side of the material with the claws showing. Stuff lightly with poly fill. Sew the third side shut. Pin the two smaller legs to the the sides of the body of the cat. Pin the two larger legs to the bottom of the body of the cat with the opening of the tops to the edge of the cat sewing lines.
Turn the tail right side out and stuffing the tail lightly. Fold in the edges and sew the third side shut from the right side of the material. Pin to the bottom center of the one side of the unsewn cat.
Place the right side of the second piece of the cat body over the top of the first side of the cat with the pinned legs and tail. Carefully sew all but the 3 inches of one side of the cat. Turn the cat right side out. The tail and legs should look like the photo.
Add about 5 -6 tablespoons or more of beans or rice – so you have about a 1/2 inch deep of beans or rice sitting on the bottom of the inside of the cat. This helps the cat to sit up. My Grandma taught me that trick. Stuff lightly with polyfill and sew the last 3 inches of the body shut.
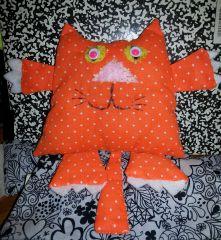
Glue wiggly eyes on and either embroider mouth lines and whiskers or use puffy paint for the mouth and whiskers. If you want to embroider the face, do this first! I used the triangle piece with felt on some of the cats. Some I embroidered and some I used the puffy paint. If you want the cat to be an ornament for the tree, attach a piece of yarn or ribbon to the top between the ears.
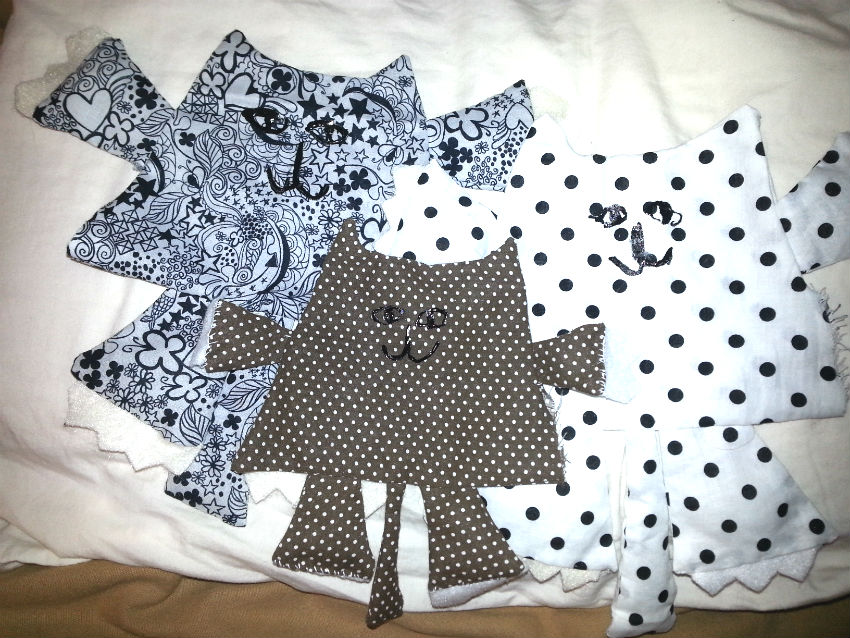
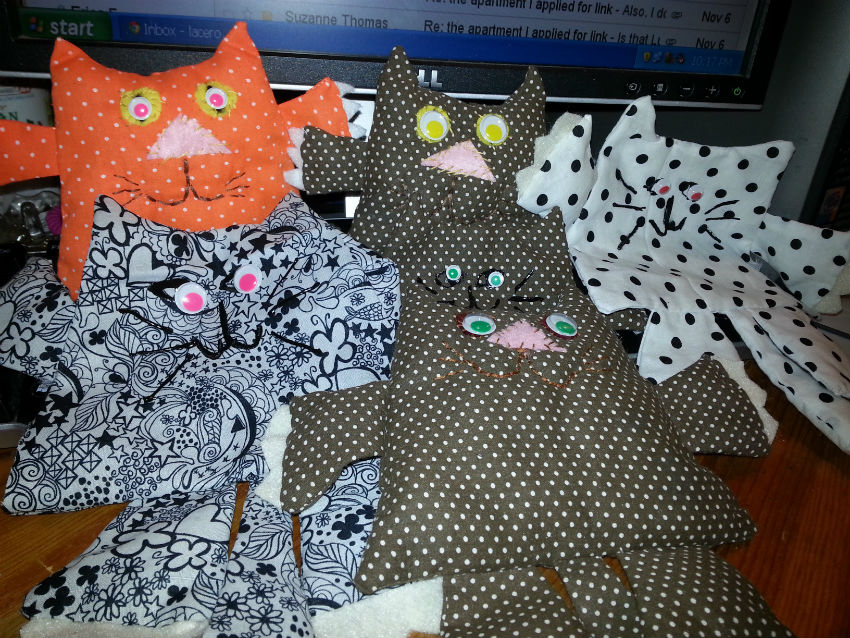
You can see all the cats here that I have made so far. This was before I added the faces and eyes and stuffing on most of them. I made the pink ones for my daughter and I. The black and white ones for my two granddaughters. The rest for gifts for others.
Felt Cat Instructions
For the red felt cat or a felt cat, cut the pattern as shown in the original pattern. Embroider eyes to the front part of the cat. Use embroidery floss to sew three sides of the arms, legs and tail. Stuff lightly. Pin the arms legs and tail to the back side of cat body. Add the cat body top to the back. Sew all but two or three inches so you can stuff the body. Add the rice or beans and stuff the body. Sew the last three inches shut. Viola! Cute Cat!
ABOUT THE AUTHOR


