My Felt Basket.
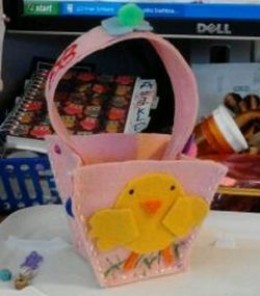 I saw a cute felt basket on line at https://www.freepatterns.com [You can join for free with your email address and download as many patterns as you like.]
I liked it and decided to make one like it for Easter for my family.
The basket from online was called Annika’s Basket designed by Molly Schaller copyright by DRG 2009.
It does NOT have a pattern for the actual basket. It just has ideas about decorating them. [see full photo and instructions at bottom of page]
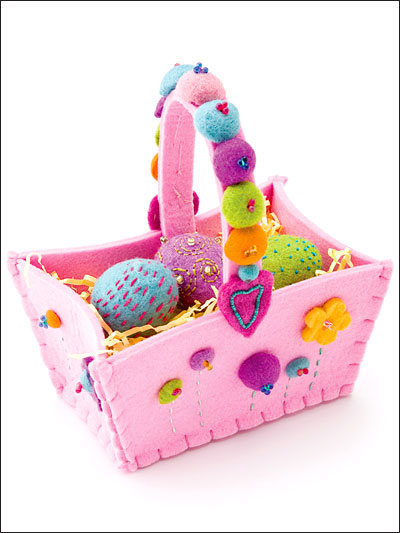
Annika’s Basket from freepatterns.com
The one on line was a rectangle shape, but I wanted one that had a square bottom and gradual sloping sides to a larger top. So I made my own pattern. I drew a pattern on paper, cut it out on felt and sewed it up. It was OK but I decided to make it a tad bigger. I made a new pattern, the one included here and all the rest were much better and bigger.
These baskets I originally designed for Easter. They came out so cute that I am making some more baskets for Mother’s Day, Halloween and Christmas in other colors. I have already cut out the felt flowers I am making for the baskets. I am using the baskets to hold the flowers as a vase. I am getting some FloraCraft Wet Foam Block medium to stick the flowers that are attached to 6 inch Bamboo Skewers sticks and painted green. Story to follow soon!
Free Pattern for basket designed by me
What you will need and instructions:
Supplies:
A. Average thickness felt in color you desire. One basket can be made from one sheet 9″ X 12″ felt. You can made it two or three tone as well.
B. Either size 5 DMC Pearl cotton or 6 strand embroidery floss your color choice to match the felt colors, or contrasting colors as you prefer.
C. Sharp scissors – I prefer the small Fiskars© brand scissors with the comfort grip.
D. Two sheets of printer paper to print the pattern
E. Cardboard from a cereal box or similar thickness
F. A pen
G. Sewing pins and Large eye needle for the embroidery floss
Pattern:
In this photo you can see the pattern pieces and how they are assembled together.
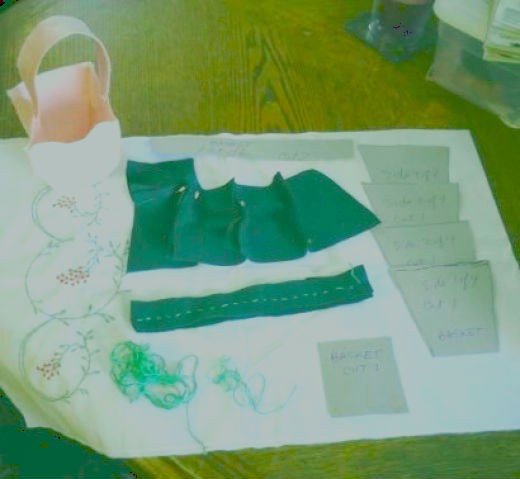
1. After you print out the pattern cut the pattern pieces out
2. Lay the pieces you cut out on the cardboard from the cereal box piece.
3. Trace the paper pieces on to the cardboard [ you can skip the cardboard if you only want to use the paper pattern a few times.]
4. Cut out the cardboard pieces
5. Lay the cardboard on the felt as shown in the photo
6. Pin the cardboard [or paper pattern] on the felt – you can trace the pattern onto the felt at this point if you wish.
7. Cut out the pieces of felt.
Sewing:
1. Assemble the felt, cord or embroidery thread, scissors, large eye needle and pins
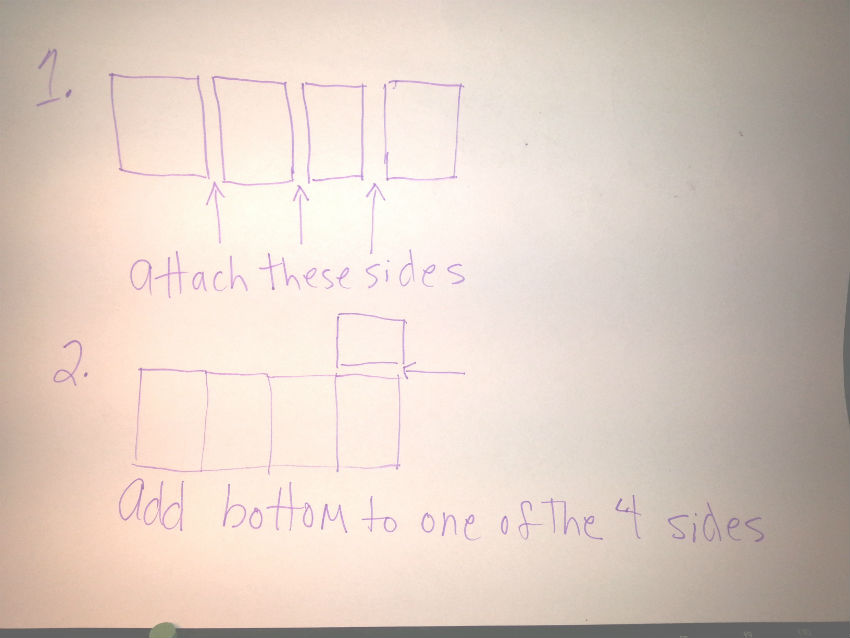
2. Pin the four basket sides together
3. Sew three sides only.
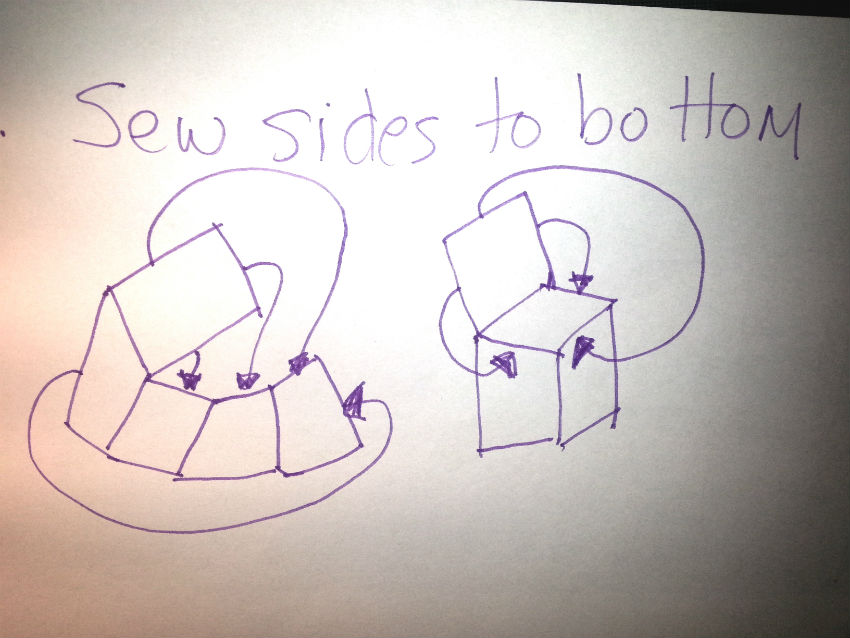
4. Attach one side of the bottom piece to one of the the four sides on either end with a pin [see photo]
5. Sew the fourth side to the first side.
6. Use pins to pin the remaining 3 sides of the bottom
7. Sew the remaining 3 bottom sides.
8. Sew the two thicknesses of the handle together
9. Pin the handle to the basket and sew the handle to the basket
You are now done sewing and ready to decorate your basket!
Basket Pattern I designed
Basket sides
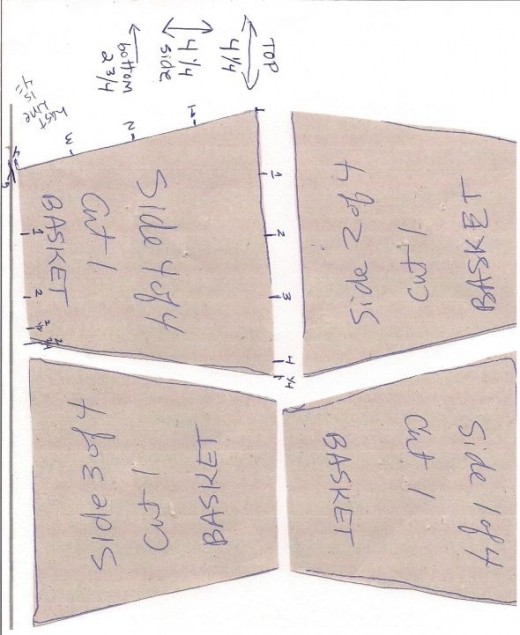
Here are the four sides for the basket. Each side is:
4 1/4 inches across the top
4 1/4 inches the length of the sides
2 3/4 inches for the length of the bottom
Basket handle and bottom
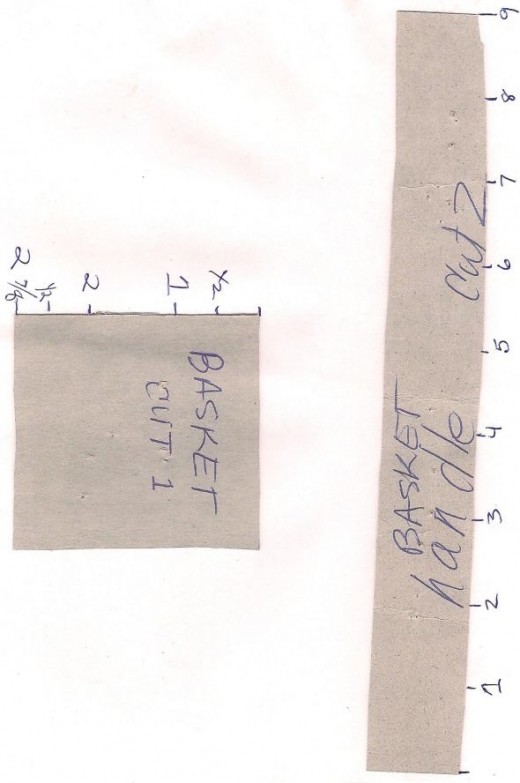
Cut one or 2 of the handles and one of the bottom pieces.
Handle is 1 inch wide by 9 inches long. If your felt is thin you might want 2 pieces.
The basket bottom is 2 – 7/8 inches square.
Excuse the uneven rectangle for the handle. I am legally blind and my lines are not always straight!
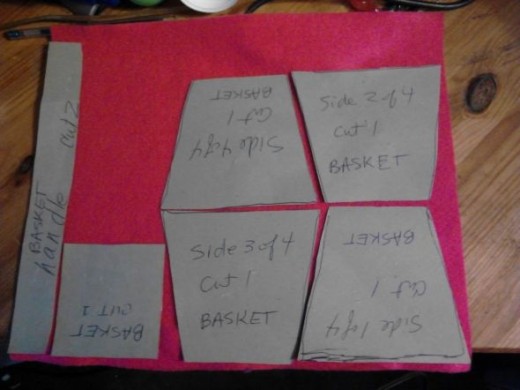
The pattern pieces on the felt
This is how the pattern pieces fit on the felt. Note that there is space at the top for the 2nd handle. It is OK for the inner handle to be a tad smaller than the top handle. These are just laying on top of the felt. Had they been pinned then you can see how it all fits perfectly.
How to pin basket pieces together
Pin the 4 sides together at each of the sides. After you sew three of the sides together, then pin the bottom on to one of the sides on the end. Sew the end piece on. Pin the 3 bottom sides to the basket ends and sew.
You can sew a line stitch or a blanket stitch. This dark green felt basket I made using 6 strands of the green embroidery thread. I used a running straight stitch for the two handle pieces.
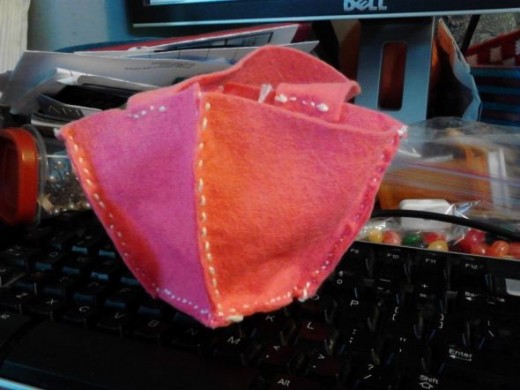
Basket in progress
Now that your basket is all sewed together you are ready to decorate it!!
The felt shapes are hand drawn on the felt with a Sharpie©fine point pen. I use good scissors like Fiskars to cut out the felt basket and the felt designs.
Assemble your embellishments and glue. I glue each felt design on first. Then when that is dry I add the pom poms or other embellishments. I glued some buttons on some of the baskets. You can add more embroidery designs or whatever you want to on each side and the handle.
The sides are small enough you can embroider as the basket is assembled. However, if it is easier you can do your embroidery before you sew the basket together. Heavier beads and buttons will have to be sewn on.
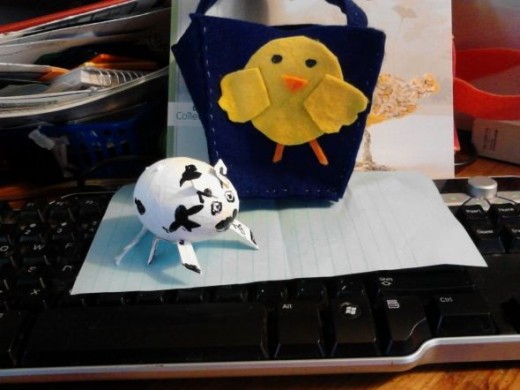
Chick of felt
The chick was from the craft book Little Birds by Susanne Woods.
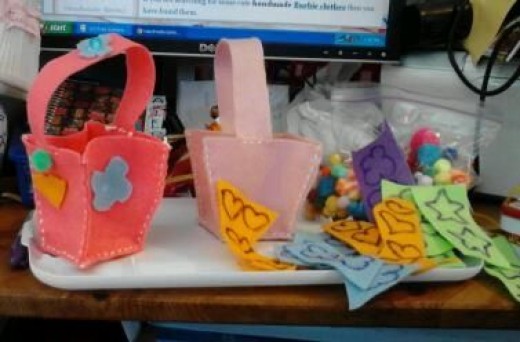
Chick and flowers
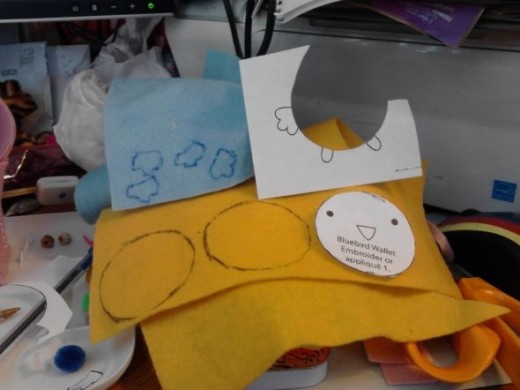
The bird is called a little round bluebird. His wings are the blue felt wings. I wanted them to be bigger as they looked too small in the first one I made. I then made my own pattern hand drawn as shown in the pattern page.
You can see the feet and tiny wings on the bird pattern that I did not use. So I just cut out the body and used that for the chick’s body. The Dark pink basket is almost done. The Pale pink basket not decorated
For the Chick:
Cut one of body. Cut 2 wings. For feet: cut two match stick size pieces in orange. Cut a tiny triangle for the beak.
I used Scribbles© 3-Dimensional black fabric paint by Duncan for the eyes.
I used Aleene’s Tacky Glue© also by Duncan to glue embellishments such as the pom poms, other pieces of felt cut out in different designs.
For the green grass I mixed some Royal Blue from Tulip Slick© dimensional fabric paint with some Daffodil yellow Folk Art© Acrylic paint. I used a small paint brush to paint the grass under the chick.
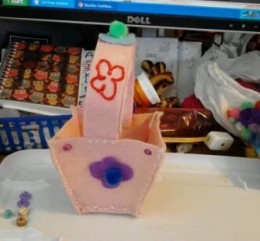
Close up of Basket
Detail of stitching of the basket. I just used 6 strands of DMC Embroidery floss and did a small running stitch. Knotted the ends. You can do a blanket stitch on the edging if you wish to embellish it and to attach the small felt designs.
Finished basket
I used the Tulip paint to hand paint directly from the tip of the bottle on to the felt. Make a test blob on paper to clear the nozzle first. I made dots from the Tulip paint as well. I glued Pom Poms on the tops of the flowers. Beads and heavy embellishments will need to be sewn on.
I would love to see your finished project with my pattern!
Cute basket and cow egg
I got the idea of the Cow egg from Angela who advertised it on Google+.
Angela got her idea from Martha Stewart’s website.
Cow Egg:
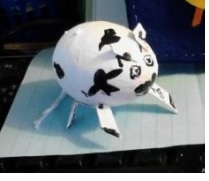
I used a plastic 2 part connecting egg from the dollar store. I painted it with 2 coats of Folk Art Acrylic white paint. After that dried I painted the black spots and the pink in the face. I used plain cardboard from a cereal box and painted that white and when dry I painted the black spots and hooves. I cut the shapes out of the cardboard and glued them on the egg.
I used Aleene’s tacky glue to glue the feet and ears on. I braided three pieces of white size 5 DMC pearl cotton thread and knotted both ends. I made the tail a bit long! I painted the black spots on the tail then glued it on to the back of the cow when all was dry.
It may not look like a real cow, but I thought it came out cute!
Their directions have you use a quail or brown egg for the base. They have you use chenille pipe cleaners for the legs. So I had to make-do with what I had on hand. Next time I will have the chenille pipe cleaners!
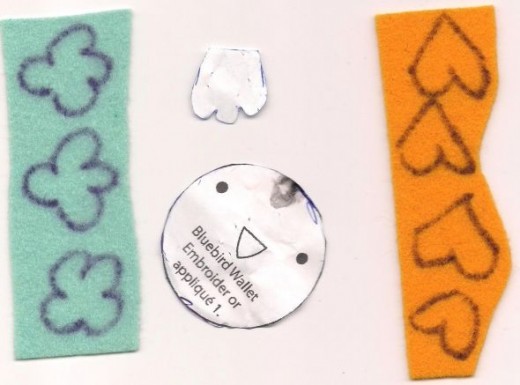
Free hand drawn flowers and hearts with paper chick pattern, You can see the wings pattern at the top of the chick. Her wings were smaller you can see that in the above photo of the paper pattern I cut out.
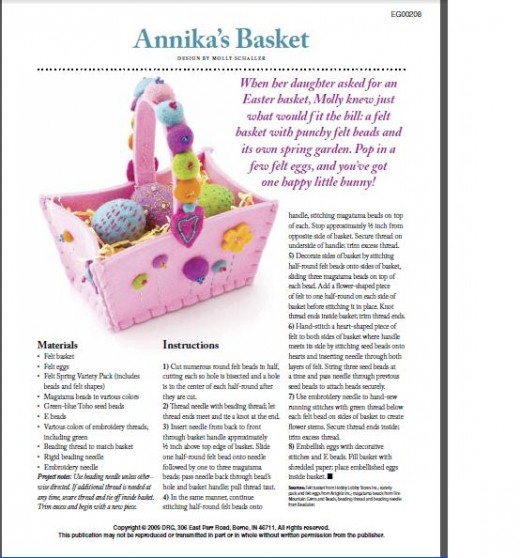
Annika’s Basket instruction page from freepatterns.com
Felt Flowers and Felt Bunnies coming soon!
ABOUT THE AUTHOR


