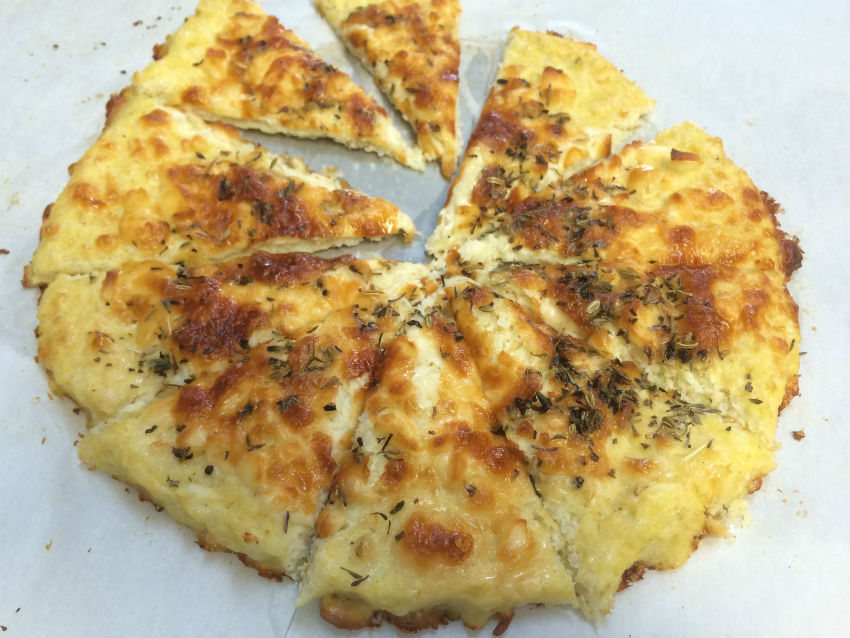
Snack or Pizza–It’s Delish!
Cauliflower Pizza Crust has become very popular today, so I decided it was time to try one for myself. It’s a fun process, especially using the Ninja Master Prep Professional to ‘rice’ the cauliflower.
 This particular vegetable adapts so well in so many recipes. When you think of the strong aroma it has while cooking, you would expect it to overwhelm, but it doesn’t. Instead, it usually takes on the flavor of the dish you are preparing. I’ve learned that from using it in mashed potatoes, fried rice, Spanish rice, and more. Burritos, meatballs, even sauces are lightened up with its addition.
So I suppose it shouldn’t have been a surprise that it make a delicious crust or snack. I made this recipe for dipping, but if you make a pizza with tomato sauce, toppings like pepperoni, veggies, and cheese, I bet you would be amazed how it tastes like pizza crust.
With a food processor (like the Ninja), you can prep the cauliflower in seconds. The finer the rice the better I think.
The Essential Strainer
The other two essentials are using a fine strainer first, then the dish towel to remove the liquids. A strainer will allow you to remove much of the water pressing down with a spoon. That will be a good start. Give it a few minutes like that first.
Then using the dish towel, roll both ends as you would to remove water from the wet towel, for as long as you can, until you see little water left to come out. The dryer the cauliflower, the firmer the crust will be. That is the hardest part.
Once that is done, it is a cinch. Combine the ingredients, and using your hands it is easy to shape to a rectangle for dipping, or into a crust for pizza. As it cooks you can see it brown. Let it get as brown as you like. Personally for dipping, I enjoy it crisp.
Of course, as with pizza, you can add your favorite spices. Next time I might try cajun flavoring.
Either way it is a surprise taste with very low calories. Many of the recipes I saw before making my own suggested a double batch. It’s a very good idea if they are snacks especially. So healthy to nibble on, they will go fast.
Give it a try. They are fun and delicious.
Rating
Serves: 10 pieces

- 1 head cauliflower
- 1 egg, slightly beaten
- 1 cup shredded light Mozzarella cheese
- ¼ to ½ cup freshly grated Parmesan or Romano
- 1 teaspoon Herbes de Provence
- ½ teaspoon garlic salt
- Rinse and dry cauliflower, then cut it into pieces.
- Run the cauliflower through the food processor so that it is rice-sized.
- Using a large saucepan, bring an inch of water to a boil.
- Add the cauliflower, and cook covered 4 minutes.
- Preheat the oven to 425 degrees.
- Line a baking sheet with parchment paper.
- Drain the cauliflower through a strainer, getting out as much liquid as possible.
- Let cool a few minutes, then put the cauliflower in a clean dish towel and squeeze to remove the liquid.
- Next, in a large bowl, combine the cauliflower with ½ cup mozzarella, 1 egg slightly beaten, 1 teaspoon dried oregano, 1 teaspoon dried basil, and ½ teaspoon garlic salt.
- Stir the mixture well.
- Scoop the cauliflower mixture onto the pan.
- Form it into a 8½ x 11 inch rectangle, flattened to about ¼ inch thick.
- Place in the oven for 30 minutes, or even longer until the crust is golden brown and firm.
- Remove from the oven and sprinkle with the remaining mozzarella and the parmesan cheese.
- Bake another 7-10 minutes, or until the cheese is melted.
- Cut into servings.
- Serve with your favorite pasta sauce or dressing.


October 21, 2015
I’ve made cauliflower pizza a couple of times and it is delicious. Definitely more time-consuming to make than just buying ready-made crust or even dough, but so much healthier.
October 22, 2015
That sums it up Vicki, doesn’t it? It’s a fun process and so unusual when it is finished. Love how healthy it is compared to regular pizza crust.
October 21, 2015
You’re making me hungry!! Wow that looks so good. Thanks for sharing.
October 21, 2015
Thanks Giovanna, it is fun to see become a crust!
October 21, 2015
Merry, your cauliflower cheese pizza looks absolutely amazing. Thank you for explaining so well how to make the crust. I’ve always wondered how it’s done.
October 21, 2015
Thank you Kathryn. It was fun to try. You’ll like it I think, and make a gorgeous creation with it. Hope to try it with veggie toppings next.