

iPhone Photography 101 – Silhouettes and Sunshine.
As a beach photographer I find that I’m constantly looking for new ways to make my sunrise shots memorable. I take photographs every day, regardless of the weather, and I try to find different ways of capturing the moment. Silhouettes have become an important part of my workflow and have played a part in creating some very dramatic photographs.
Here in Florida a bright sun is a major feature of the dawn landscape. The morning is a great time to take photographs, as the color and direction of the sunlight is much more useful to work with. The clouds can provide a fabulous backdrop, but if the sun is bright, what then?
With cellphone photography the usual tricks that photographers use to cope with the brighter light – changing shutter speed and aperture settings, using bracketing techniques – can’t be applied. But there are lots of ways to make the most of things.
Shade and Shadows
At such times I take a look around for shade and for shadows. If a subject needs a little fill-in light, this is the time to use your camera’s flash, or work with a reflector (a good tip is to use a car window sunshade – the silver reflective finish is perfect) to throw a little ambient light around. If you are with friends, ask them to put their phone on torch-mode and add a little extra light source.
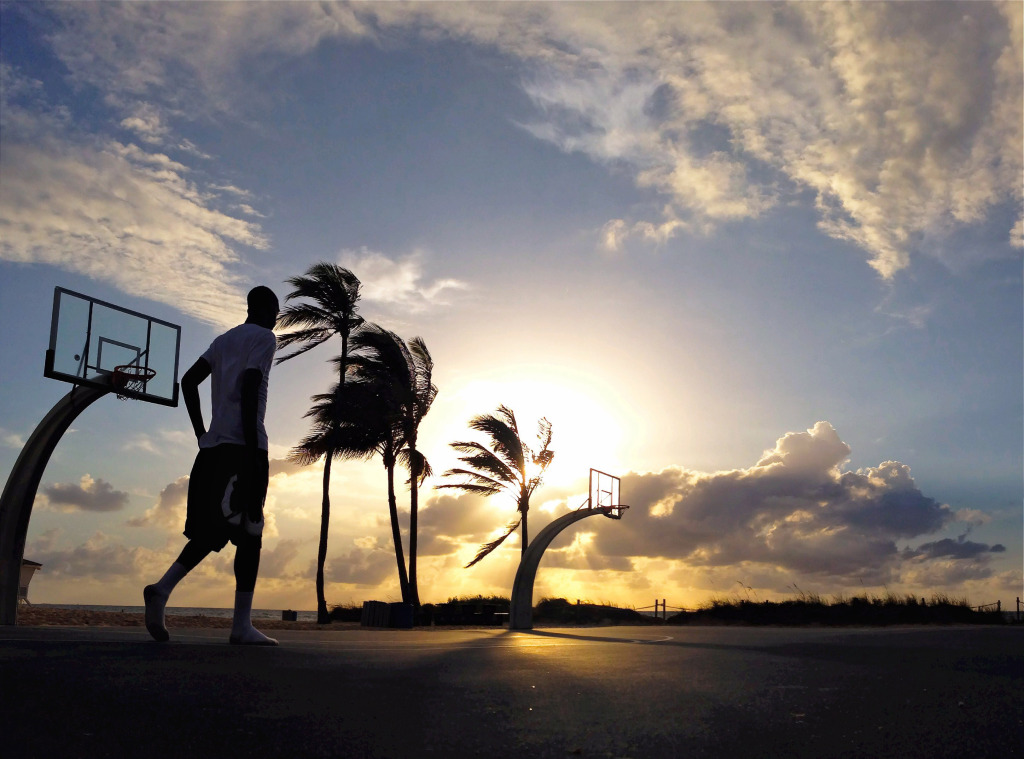
But when the sun is quite strong, then a silhouette is an excellent solution. A good silhouette generally consists of a distinct dark outline against a bright background. With the sun low and bright you can achieve images of great drama and power by simply standing back and looking.
Look particularly for shape and contrast in a scene and you can open up all sorts of new avenues. Suddenly a passerby isn’t just a nuisance walking into shot, they can add scale and character to an already dramatic situation. Shape here is everything, so look to isolate the best ones.
Thinking Ahead
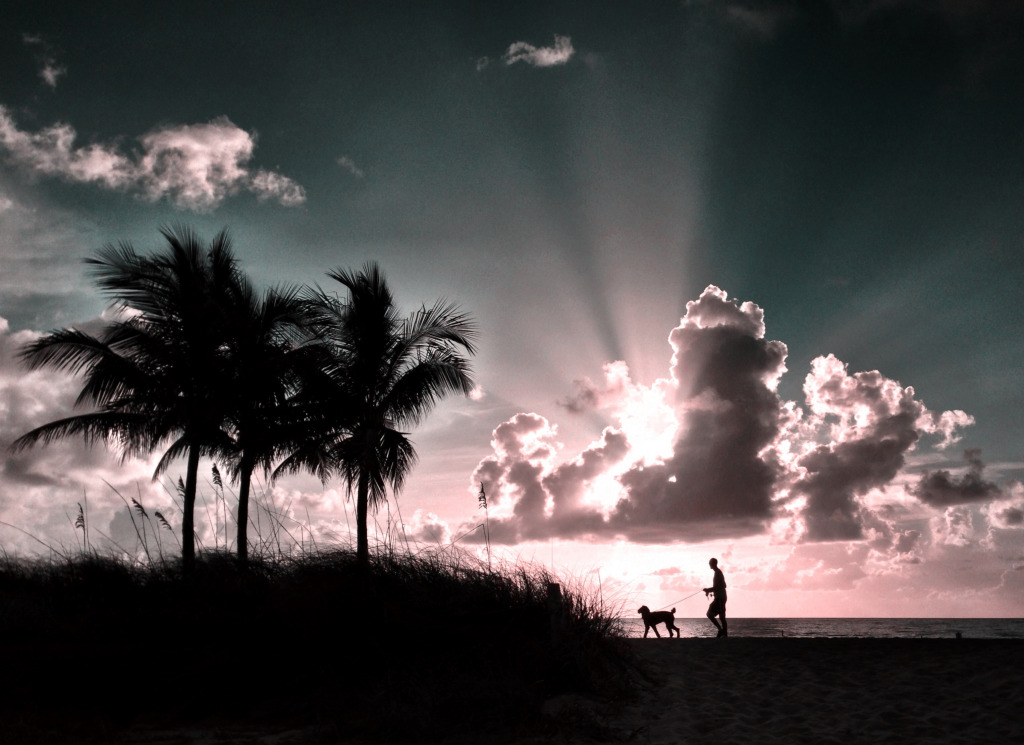
A great photograph sometimes takes a little advanced knowledge. I shoot the same patch of beach so I know the best vantage points and angles. So if my subject – say a man walking a dog – is walking across the scene I know when to move to bring out the best in the scene.
If you are travelling to an unfamiliar location, do a little advance thinking and plan ahead; As you walk around make a note of good vistas and dramatic scenes and return to those places where you know that the morning or evening sun will create the most drama. A wonderful app to use on your image making trips is TPE – The Photographer’s Ephemeris, which lets you calculate sunshine angles at any time of day from any location – good for both landscapes and cityscapes.

Step Into the Shadows
Ultimately the best silhouettes are created by putting the sun right behind the subject. I’ve developed the habit of looking for strong shadows and stepping into them to see what kind of shapes are being created. A strong subject is always going to make for a strong result, providing you can isolate the shapes. People are always great additions, whether near to the camera or far away, so if you are with friends, or have eager children make good use of them. Kids can be the best models for silhouettes so have a little fun, get them leaping around…

In The Frame
Framing is so important – sometimes elements can be placed into shot from the edges to add a good counterpoint – a branch of a tree, maybe, or the shape of a building. Not only can this add to the shot but it can also be a great way to block direct sunlight.
Keeping things simple works best, though. An uncluttered scene can help the eye concentrate on the subject so much more. I sometimes find a perfect scene and then wait for someone or something to move into shot. A human presence in an already dramatic scene can transform the whole picture.

Tap and tilt
If you are shooting with a cellphone, as most people do these days, tapping the screen at the point of most contrast can help the camera adjust to the best exposure. My maxim is tap to focus, tilt to expose. Sometimes altering the angle of your camera lens can make all the difference, helping the contrast and colors so that the image is so much richer and sharper.

Look for the details
Do try different angles so that you can pick out partially silhouetted features. It might not be immediately clear when you are taking the photograph but sometimes you can see details later on that are well work accentuating with some app work afterwards. Take lots of shots – in this digital world there’s no need to limit yourself to one or two images of a given scene. Try five, ten or more if you know that there’s something interesting to capture.
Finally if you can work on the image afterwards try different effects and tints. I use apps like Camera+, Snapseed, iColorama, and Laminar to play with the possibilities. Darkening an image slightly, then adding contrast and filter effects creates all kinds of power and drama. Get to know a favourite app and push the limits of what you know. You may have an award winner just sitting there on your phone. Just waiting for that finishing touch!

ABOUT THE AUTHOR
